![]()
![]()

Propspeed
- Dometic
- Victron Energy
- Copper Coat
- Hella Marine Lighting
- Maestrini
- Sika
- Michigan Marine Propulsion
- Marlow
- Tecma (THETFORD)
- Propspeed
- Trudesign
- TRAC Ecological
- AERE Solution
- Selmar
- U-Line
- Vitrifrigo
- PSS (PYI)
- Shurhold
- Semco
- Cooper
- Green Corp Marine
- SPX's Johnson Pumps
- Nautical Anodes (RAKICEVIC)
- Hoses Technology
- March Pump
- Scot Pump
- Snappy
- Tessilmare
- Starclean
- S.A M-Tech
- Collinite Wax
- K2r
- Flitz
- Polyform
- Rydlyme Marine
- Side Power
- Oguz Marine
- The Absorber
- Albo Marine Generator
- CEM

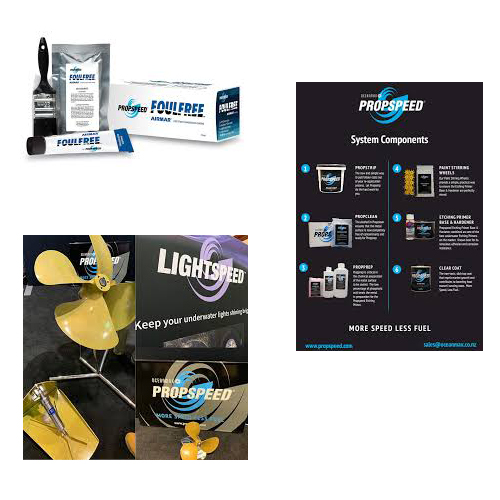
Propspeed
More Speed, Less Fuel.
Propspeed is the original propeller and running gear foul-release coating system, specially formulated to prevent marine growth from bonding to metal surfaces below the waterline.
Lightspeed
More Light, Less Fuss.
Lightspeed is the first transparent foul-release coating specifically developed for underwater lights.
![]()
Transducer Defense. Foul-Release.
Fouling on the face of transducers can reduce their sensitivity, decreasing bottom-echo returns and fish targets. Keep your transducer performing at its peak with Foulfree.
Propstrip
Save time and money with Propstrip. The easy way to remove old Propspeed from metal surfaces.
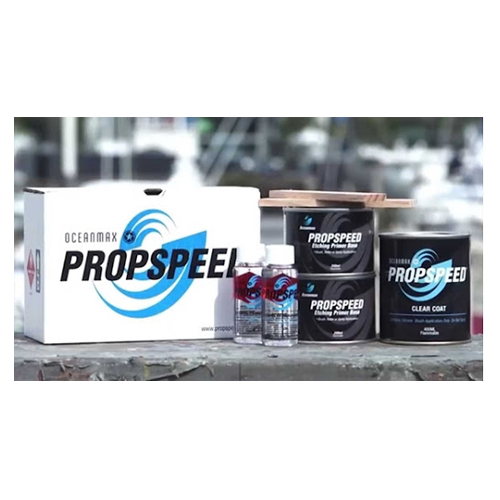
Propspeed application overview
The process to apply Propspeed isn’t difficult, but must be strictly adhered to. We recommend using a Propspeed approved applicator, or experienced marine painter.
Propspeed is available in a 200ml kit– which will coat a single 24 inch or 60cm propeller, a 500ml kit – which will coat a set of 2 X 42 inch or 100cm propellers, and a 1 litre kit – which will coat a set of two 48 inch or 120 cm propellers. It is important to ensure that you have sufficient product on-hand before starting the application process. For more info, refer to you’re the Propspeed coverage guide.
For the capable applicator, there are 5 simple steps to achieve a great result:
- Metal surface preparation
- Initial clean
- Metal conditioning
- Etching Primer
- Clear Coat
In addition to the Propspeed kit, you will need these items:
- 80-grit sandpaper (both wet and dry)
- Plenty of rags
- Disposable brushes
- Disposable foam rollers
- Disposable plastic paint trays
- Mixing sticks
- Paper paint suits / overalls
- Disposable gloves
- Eye protection
- Dust sanding mask
The application of Propspeed requires planning. Make sure you have installed and taped over all zincs, all application gear is on hand, and you thoroughly understand the process – then you’re ready to get started
Removing Propspeed with Propstrip
Propstrip is a safe, low toxicity remover that reduces labor costs for removing Propspeed by up to 70%.
Make sure the area you are working with is totally dry. Propstrip DOES NOT like any moisture. Water de-activates the Propstrip completely. Ensure any areas that are not being treated are adequately protected from Propstrip. If the propeller still has a silicone layer, you may need to be abrade the surface with 80 grit sandpaper. This will allow the Propstrip to work more effectively, penetrating the silicone faster.
Apply Propstrip liberally with a brush ensuring there is a thick coating on 100% of the surface being treated allowing for complete saturation of the part.
In cold conditions, 10-15°C or 50-60°F, it could take up to 3 hours to release the old Propspeed or if colder, it may take longer than 3 hours.
In hot conditions above 35°C or 95°F it may be necessary to ensure the treated area is in shade to prevent the application from drying out while performing its action.
Propstrip works faster in hot conditions, so within 1-3 hours you should begin to visually observe the discoloration of the old Propspeed.When the product has started to bubble and change colour, it is doing its job. Test a small area with a scraper to see if it will freely release from the substrate.
Once ready, wash with a hose or a bucket of water and a Scotch-Brite pad. Any remaining product is removed using a wet Scotch-Brite pad or wet/dry sandpaper. Look after your environment: we strongly recommend the use of hessian (burlap) or a ground cover to capture the removed product.
Once the old Propspeed has been removed, sand the surface to an 80-grit profile. If the boat has not had Propspeed applied before, simply abrade the surface to an 80-grit profile. This can be done using a mechanical sander. For difficult areas hand sand using wet or dry 80-grit sandpaper. Gloves must be worn from this point onwards. Make sure you have plenty of rags on hand for the next two steps.
Surface preparation: Mechanical sanding
With any surface coating, proper surface preparation is essential.
The old Propspeed coating needs to be removed completely before a fresh Propspeed coating can be applied.
Any previously applied Propspeed on propellers, rudders, trim tabs, and drive shafts should be high pressure cleaned, removing all marine foul from surfaces, then be allowed sufficient time to thoroughly dry. Propspeed can be removed by sanding using 80-grit sandpaper. A dual action or air driven sander can be used and difficult areas wet sanded by hand.
Initial clean – using the blue Propclean wipe
Once the surface has had the old Propspeed chemically or mechanically removed it’s time to clean the surface with the Propclean wipe provided. Clean the surface with the blue Propclean wipe. Immediately dry the surface with a clean, dry, white cotton rag. Repeat until there is no residue left on the cotton rag.
Metal Conditioning – using the red Propprep wipe
Apply Propprep solution liberally using the red Propprep wipe or solution. Immediately wipe the surface with a clean white cotton dry rag to ensure no residue is left.
Propprep is acidic. Extra care should be taken when wiping the surface. The Propprep solution does not contain corrosive inhibitors, so the treated surface should be coated and primed with Propspeed as soon as possible.
You are now ready to start painting.
Metal Etching Primer – applying the first two coats
Ambient temperatures influence the application of Propspeed and the set times of the metal Etching Primer and Clear Coat. We recommend a minimum temperature of 8 degrees celcius. In hot conditions never apply the product in direct sunlight or in humidity above 85%.
Open the can of Etching Primer. The yellow pigment in the bottom of the can must be thoroughly mixed before adding the Etching Primer Hardener. This can be done quite easily using the mixing stick provided. This usually takes no more than two or three minutes.
Note: failure to thoroughly mix the Etching Primer Base may lead to premature hardening, inconsistencies and short life expectancy of the final coating system.
Once the Etching Primer Base has been thoroughly stirred and there are no solids left in the bottom of the can you can now add the bottle of Etching Primer Hardener to the Etching Primer Base.
The Etching Primer can be applied using a brush and or foam roller.The application process must be well planned due to the quick re-coat times between coats. The timing of each coat is essential to enable the required chemical bonding between coats. When applying Propspeed, be aware of the area to be coated and the recoat window. You may have to apply the Etching Primer and Clear Coat one section at a time.
The Propspeed system requires two generous coats of Etching Primer. If moving the prop, be careful not to damage the fresh coating.
When coating the blades of the propeller remember to start in the hub area and work your way out to the end of the blade. Once you have applied the first coat of Etching Primer wait approximately 3 to 5 minute before applying the next coat. To test if it’s ready, use the dry-to-touch test method.
What is the dry-to-touch test method?
Take your gloved index finger and touch the wet Etching Primer. If it leaves a small print on the primed surface but no Etching Primer transfers to the fingertip of your glove, you can begin applying the next coat. The wait-time between coats of Etching Primer is very important and must be adhered to. Make sure you have some idea of how time is progressing.
Using 27 degrees celcius as a benchmark you have 3 to 5 minutes from the start of applying the first coat of Etching Primer to the start of applying the second coat of Etching Primer.
Cooler temperatures will lengthen the recoat time between the two coats, and warmer temperatures will shorten up the recoat time between the two. Know what the ambient temperature is when starting.
The same 3-5 minute rule applies between the second coat of Etching Primer and the Clear Coat. Be sure you are ready to move onto step #5 immediately.
Clear Coat
Before applying the Clear Coat, use the dry to touch test method to ensure the second coat of Etching Primer has dried sufficiently.
Apply a thin layer of Clear Coat with a brush only. Do not use a foam roller here. The Clear Coat is applied and brushed much like conventional varnish. Make sure there are no heavy runs or sags in the Clear Coat before moving on to another area. You will have 5 to 10 minutes to touch-up these areas before the Clear Coat dries.
After completing the application of the Clear Coat, visually observe all areas, ensuring there are no misses or gaps. The Clear Coat will dry to a glossy finish, helping you find any uncoated areas.
Propspeed requires a minimum of eight hours to dry before launching. In cold climates, we recommend at least 24 hours drying.
Propspeed – the most inexpensive repower a boat owner can do to increase the performance of their vessel.